
Website Updates Not Showing?
You’ve added or updated something on your website—maybe a new post, document, or a page edit—but the changes don’t appear when viewed on another browser or device. Why?
The Cause: Caching
Most websites use caching to speed up performance. This includes:
- Your website keeping a stored version of pages
- Web browsers (like Chrome, Edge, Safari) saving cached versions locally
- Global servers (CDNs) that distribute content closer to your visitors
While caching helps performance, it can sometimes cause delays in showing your latest updates.
How to Fix It
1. Clear Your Browser Cache
Use one of these shortcuts to reload the most recent version of the site:
- Windows/Linux:
CTRL + F5orSHIFT + F5 - Mac (Chrome/Firefox):
CMD + SHIFT + R - Safari (Mac): Hold
SHIFTand click the Reload button
2. Purge the Website Cache
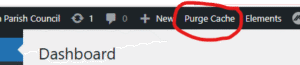
After updating your website (adding a post, uploading a file, or editing a page), use the Purge Cache button. You’re already logged in—so it’s just one quick step to push your changes live for all visitors.
Optional: Optimise StackCache Settings
StackCache is configured for high-traffic websites. But most Council websites don’t see thousands of visitors daily—so the default cache settings may delay updates unnecessarily. We recommend adjusting the cache settings to refresh every 1 hour instead of using the default longer durations.


Optional: Advanced Cache Settings
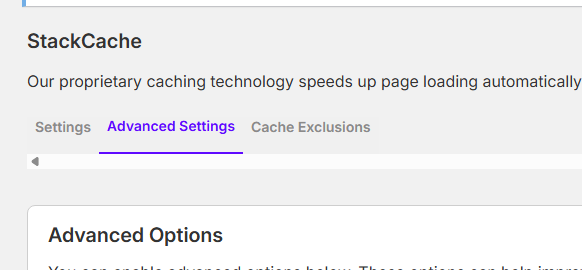
If you want more control over how quickly your website shows updates, you can also adjust the options in the Advanced Settings in StackCache.
While you’re logged in:
- Go to the StackCache menu
- Click on Advanced Settings
We recommend enabling the following two options:
- ✅ Make Automatic Cache Purging: Purge Everything
- ✅ Perform Automatic Cache Purging For All Post Types
These settings make sure that when you update any type of content—posts, documents, or pages—the system clears all the relevant cache automatically. This helps your changes go live immediately without needing to use the manual “Purge Cache” button each time.
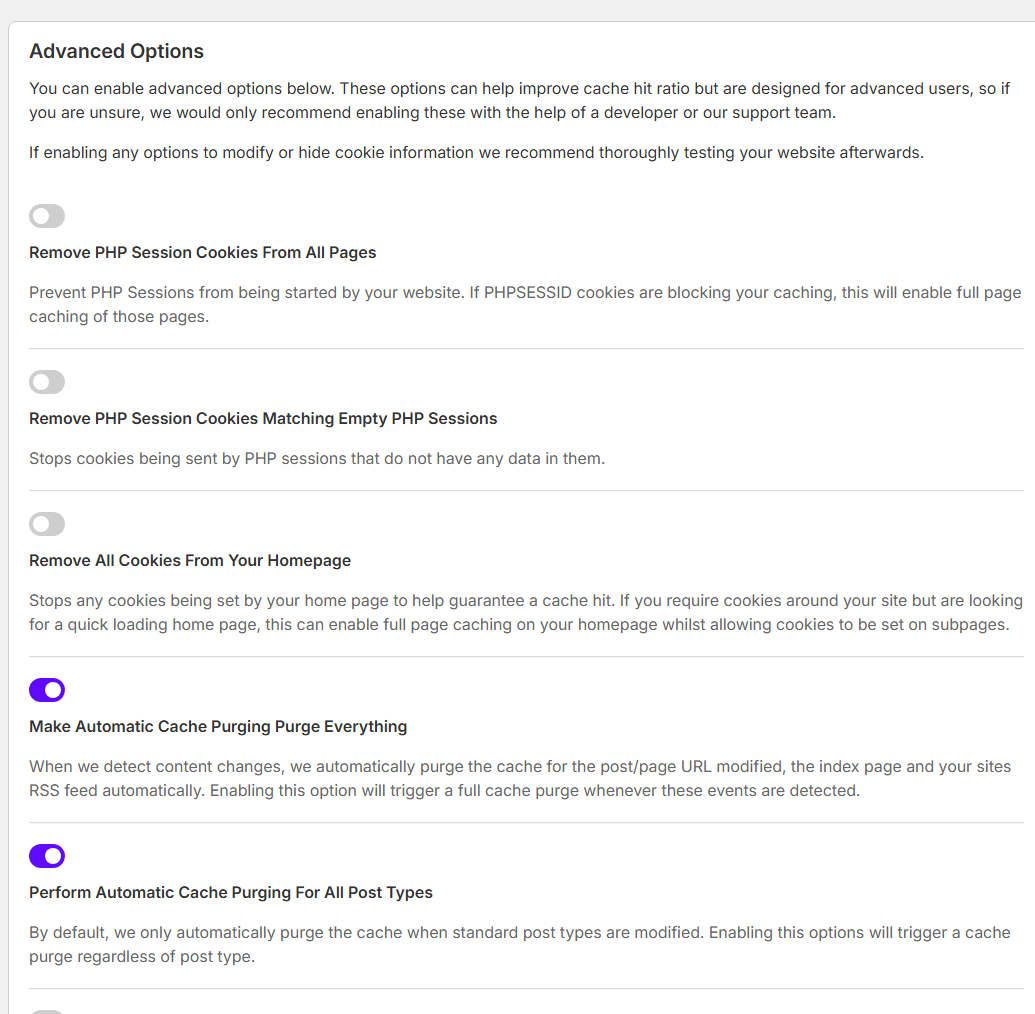
Example of the Advanced Settings with both recommended options switched on.